As an Amazon Associate I earn from qualifying purchases.
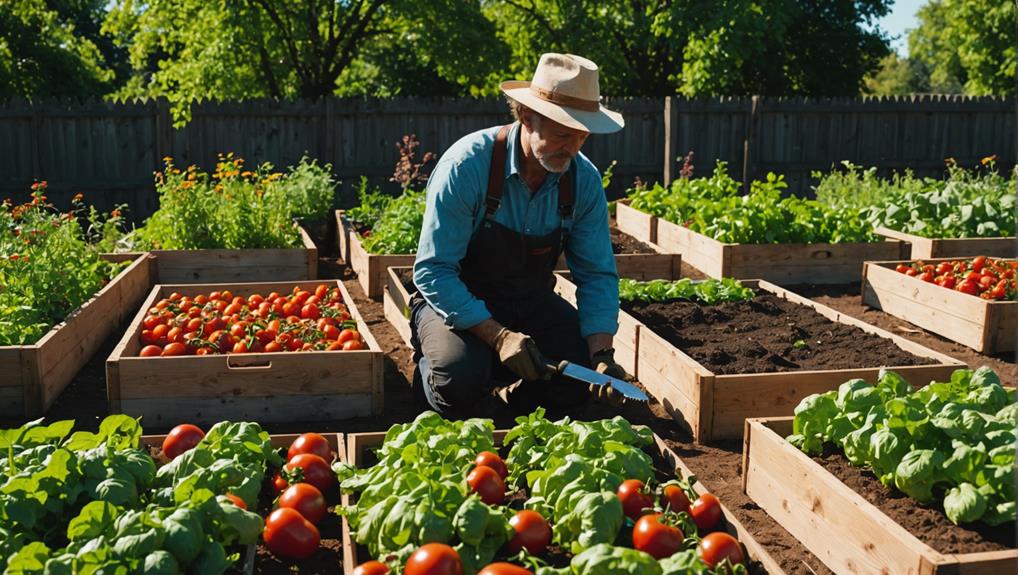
Have you ever wondered how you would survive in a situation where food was scarce? It’s a frightening thought, but being prepared with survival food preservation methods can make all the difference. In this article, we’re going to discuss some essential methods that you should know to ensure your food remains edible and safe for consumption during emergencies. So, let’s dive in and learn how to preserve food for survival!
One of the most widely known methods of food preservation is canning. This ancient technique involves sealing food in jars or cans and heating them to destroy any microorganisms that may cause spoilage. Canned food can have an incredibly long shelf-life, making it an excellent option for emergency situations. We’ll dive deeper into the canning process and provide you with some tips and tricks along the way.
Another method that can come in handy during survival situations is dehydrating food. By removing the moisture from fruits, vegetables, and even meats, you can significantly extend their shelf life. Dehydrated food is lightweight, making it easy to carry and store. We’ll explore the steps involved in dehydrating food and discuss some creative ways to incorporate dehydrated ingredients into your meals.
Lastly, we’ll touch on freezing as a food preservation method. Freezing is a simple and effective way to preserve perishable items like meat, dairy, and produce. It helps to slow down the growth of bacteria and other microorganisms, maintaining the quality and taste of your food. We’ll provide you with some helpful tips on how to freeze food properly and offer ideas on what types of food can be successfully frozen for long periods.
So, whether you’re planning for a potential emergency or simply interested in learning new techniques, this article will cover it all. By the end, you’ll be equipped with the knowledge to preserve your food effectively and ensure you have nourishment in challenging times. Let’s get started and dive into the fascinating world of survival food preservation! Methods You Should Know
In a world full of uncertainty, it’s always a good idea to be prepared for any situation that may arise. One crucial aspect of survival is food preservation. By knowing different food preservation methods, you can ensure a steady supply of food during challenging times. In this article, we will explore various survival food preservation methods that you should know.
Canning
Water Bath Canning
Water bath canning is an excellent method for preserving high-acid foods such as fruits, jams, jellies, and pickles. It involves immersing jars filled with food in a boiling water bath for a specified period. The heat kills any bacteria and other microorganisms present while creating a vacuum seal that keeps the food safe for an extended period.
To water bath can, you first need to sterilize your jars, lids, and bands by boiling them. Then, prepare your fruits or vegetables by washing and cutting them into the desired size. Next, pack the jars tightly with the prepared food, leaving a bit of headspace at the top. Finally, place the filled jars into a pot of boiling water, ensuring they are fully submerged. Cook them for the recommended time, and once done, remove the jars and let them cool. You will hear a satisfying “pop” sound as the vacuum seal forms.
Pressure Canning
Pressure canning is ideal for low-acid foods such as vegetables, meats, and seafood. These foods require higher temperatures to kill any harmful bacteria, which can only be achieved using a pressure canner. A pressure canner works by creating steam that raises the temperature inside the container above the boiling point of water, effectively eliminating any potential foodborne pathogens.
To pressure can, begin by sterilizing your jars, lids, and bands as you would for water bath canning. Prepare your ingredients by cleaning and cutting them, ensuring they are suitable for canning. Pack the jars tightly with the food, making sure to leave some headspace at the top. Place the jars into the pressure canner and follow the manufacturer’s instructions regarding water levels, pressure, and processing time. Once the process is complete, allow the canner to cool naturally before opening and removing the jars.
Dehydration
Sun Drying
Sun drying is one of the oldest and simplest methods of food preservation. It involves exposing the food to direct sunlight for an extended period, allowing the sun’s heat to remove moisture from the food. This process concentrates the flavors and extends the shelf life of the food.
To sun dry food, select ripe fruits, vegetables, or herbs that are clean and free from any blemishes. Slice the produce into thin, uniform pieces, ensuring they are all similar in size. Place the pieces on a drying rack or screen and position it in an area with direct sunlight. Remember to protect the food from insects and animals by covering it with a mesh or cheesecloth. Allow the food to dry for several days or until it reaches the desired texture. Store the dried food in airtight containers away from heat and light to maintain its quality.
Air Drying
Air drying, also known as open-air drying, is similar to sun drying but can be done indoors or in a well-ventilated area. It is ideal for herbs, flowers, and some fruits and vegetables that require a controlled environment to dry properly.
To air dry food, prepare your ingredients by washing and drying them thoroughly. If you are drying herbs, tie them in small bundles and hang them upside down in a warm, well-ventilated room. For certain fruits and vegetables, you can use a drying rack or screen. Ensure that the food is spread out in a single layer to maximize airflow. Depending on the humidity and temperature of your environment, air drying can take a few days to several weeks. Once the food feels completely dry and brittle, transfer it to airtight containers for storage.
Food Dehydrator
Using a food dehydrator is a convenient method of drying food as it offers consistent temperature control and airflow. A food dehydrator is an electric appliance specifically designed to remove moisture from food quickly and efficiently.
To dehydrate food using a food dehydrator, prepare your ingredients by washing and slicing them into uniform pieces. Place the pieces on the dehydrator trays, ensuring they are spread out evenly. Adjust the temperature and time settings according to the specific food you are dehydrating. Check the food periodically to ensure it reaches the desired dryness. Once fully dehydrated, store the food in airtight containers or vacuum-sealed bags.

This image is property of themakinglife.com.
Freezing
Flash Freezing
Flash freezing is a rapid freezing process that helps preserve the texture and quality of food. It involves freezing foods at extremely low temperatures within a short period. Flash freezing is particularly useful for preserving fruits, vegetables, and even cooked meals.
To flash freeze, start by preparing your ingredients as you normally would. For fruits and vegetables, wash and cut them into desired sizes or shapes. Lay the pieces out in a single layer on a baking sheet or tray lined with parchment paper. Place the tray in the freezer and leave it for a few hours until the food is completely frozen. Once frozen, transfer the individual pieces into freezer-safe bags or containers. Remember to remove any excess air from the bags to prevent freezer burn.
Freeze-drying
Freeze-drying, also known as lyophilization, is a preservation method that involves removing moisture from food by freezing it and then subjecting it to a vacuum environment where the frozen water turns directly into vapor without passing through the liquid stage. This process preserves the shape, color, texture, and flavor of the food while extending its shelf life significantly.
To freeze-dry food at home, first, prepare your ingredients by washing, cutting, and blanching them if necessary. Arrange the pieces in a single layer on a tray or rack, ensuring they do not touch each other. Place the tray in the freezer and leave it until the food is completely frozen. Once frozen, transfer the food into a vacuum-sealed bag or container and place it into a freeze-dryer. Follow the manufacturer’s instructions for the specific freeze-drying process, including time and temperature settings. Once done, store the freeze-dried food in airtight containers away from moisture and heat.
Fermentation
Kimchi
Kimchi is a traditional Korean dish made from lacto-fermented cabbage and various seasonings. Fermentation not only extends the shelf life of the cabbage but also creates a tangy, flavorful food rich in probiotics and vitamins.
To make kimchi, start by washing and cutting a head of Napa cabbage into bite-sized pieces. Dissolve salt in water and submerge the cabbage pieces, ensuring they are fully covered. Let the cabbage sit for a few hours until it becomes slightly wilted. Next, rinse the cabbage thoroughly to remove excess salt. In a separate bowl, mix together garlic, ginger, chili paste, fish sauce, and any other desired seasonings. Add this mixture to the cabbage, ensuring it coats every piece. Pack the cabbage and seasonings tightly into a jar, pressing down to remove air bubbles. Seal the jar and let it sit at room temperature for a few days, then transfer it to the refrigerator. The kimchi will continue to ferment, developing its distinctive flavor over time.
Sauerkraut
Sauerkraut is another well-known fermented cabbage dish that originates from Germany. It is made by fermenting shredded cabbage with salt, resulting in a tangy and crunchy condiment.
To make sauerkraut, begin by washing and shredding a head of cabbage. In a large bowl, mix the shredded cabbage with salt, working the salt into the cabbage to help release its natural juices. Transfer the cabbage mixture to a clean glass jar, pressing it down firmly to remove air bubbles. The cabbage should be covered by its natural juices. If there is not enough juice, add a bit of saltwater solution (1 teaspoon of salt per cup of water) to ensure the cabbage is fully submerged. Place a weight, such as a smaller jar filled with water, on top of the cabbage to keep it submerged. Cover the jar with a cloth or lid with an airlock to allow fermentation gases to escape. Let the sauerkraut ferment at room temperature for several days to a few weeks, depending on your desired level of tanginess. Once fermented, store the sauerkraut in the refrigerator.
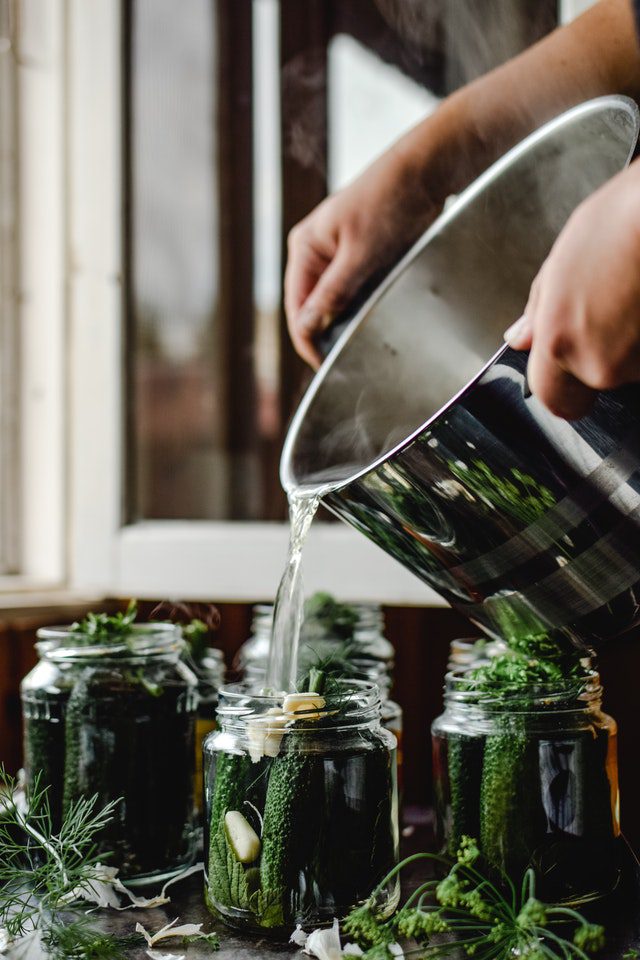
Pickles
Pickles are cucumbers that have undergone lactic acid fermentation, resulting in a tangy and crunchy snack. Most types of cucumbers can be pickled, including kirby cucumbers and garden cucumbers.
To make pickles, start by washing your cucumbers thoroughly and trimming off the ends. If desired, slice the cucumbers into spears or rounds. Dissolve salt in water to create a brine solution. Place the cucumbers into clean glass jars, ensuring they are packed tightly. Add desired seasonings, such as dill, garlic, or chili flakes, to the jars. Pour the brine over the cucumbers, ensuring they are completely submerged. You can use a weight, such as a smaller jar filled with water, to keep the cucumbers submerged. Cover the jar with a cloth or a lid with an airlock. Let the cucumbers ferment at room temperature for a few days to a week, depending on your desired level of sourness. Once pickled, transfer the jars to the refrigerator for long-term storage.

This image is property of greentumble.com.
Root Cellaring
Building a Root Cellar
Building a root cellar provides an excellent way to store perishable produce like root vegetables, apples, and winter squashes. A root cellar creates a cool, dark, and humid environment, ideal for extending the shelf life of fresh produce.
To build a root cellar, select a suitable location such as a basement, crawl space, or underground area in your property. The site should be well-drained, insulated, and easy to access. Determine the size of the root cellar based on the amount of produce you plan to store. Construct the walls and ceiling using moisture-resistant materials such as concrete, stone, or cinder blocks. Install a door with weatherstripping to ensure a tight seal. Ensure proper ventilation by adding vents or exhaust fans to control humidity levels. Place shelves or storage bins inside the root cellar to organize and store your produce. Monitor the temperature and humidity regularly to ensure the conditions remain optimal for storage.
Storing Produce
Proper storage techniques are essential for preserving produce in a root cellar. Some fruits and vegetables require specific conditions to maintain their freshness and quality.
Root vegetables such as carrots, beets, and potatoes should be cleaned and dried thoroughly before storing. Remove any damaged or diseased pieces to prevent spoilage. For optimal storage, place the vegetables in breathable bags or crates, ensuring they have enough space to prevent overcrowding. Store them in cool, dark areas away from direct sunlight. Apples can also be stored in the root cellar. Sort them by variety and store them in wooden or plastic crates. Check the apples regularly and remove any that show signs of spoilage to prevent the spread of rot. Winter squashes should be cured for a week or two in a warm, dry area before storage. After curing, place the squashes in a single layer on shelves or in crates, ensuring they are not touching each other.
Smoking
Hot Smoking
Hot smoking is a preservation method that involves smoking food at temperatures between 165-185 degrees Fahrenheit (74-85 degrees Celsius). The heat not only imparts a smoky flavor to the food but also helps kill any bacteria and parasites, making it safe for consumption.
To hot smoke food, start by preparing your ingredients. For meat, trim off excess fat and apply your desired seasonings or marinades. Preheat your smoker to the desired temperature and add your choice of wood chips or chunks to create smoke. Place the food on the grates, ensuring there is enough space between the pieces for the smoke to circulate. Smoke the food for the recommended time, depending on the type and size of the meat. Check the internal temperature of the food using a meat thermometer to ensure it is fully cooked. Once done, let the food rest before serving or storing.
Cold Smoking
Cold smoking is a preservation method that involves smoking food at temperatures below 100 degrees Fahrenheit (38 degrees Celsius). It is primarily used to add flavor and texture rather than fully cooking the food.
To cold smoke food, you will need a separate cold smoke generator or a smoking chamber equipped with a cooling system. The purpose of cold smoking is to expose the food to smoke without raising the temperature enough to cook it. This method is commonly used for fish, cheese, and cured meats. Follow the manufacturer’s instructions for your specific smoking equipment and ensure proper ventilation to prevent the buildup of harmful gases.

This image is property of theprepared.com.
Salting
Dry Salting
Dry salting is an ancient preservation method that involves using salt to draw out moisture from food, inhibiting the growth of bacteria and microorganisms. This technique is commonly used for preserving meat and fish.
To dry salt food, start by cleaning and trimming the meat or fish. Prepare a mixture of salt and any desired spices or herbs. Rub the salt mixture thoroughly onto the surface of the food, ensuring it is evenly coated. Place the salted food into a container and cover it with a lid or wrap it tightly with plastic wrap. Allow the food to sit in the refrigerator for a few days to several weeks, depending on the thickness of the meat or fish. During this time, the salt will draw out the moisture, preserving the food and enhancing its flavor. Rinse off the excess salt before using or cooking the preserved food.
Brine Salting
Brine salting is another method of preserving food using a saltwater solution, known as a brine. It is ideal for preserving vegetables and certain meats.
To brine salt food, create a brine solution by mixing salt in water until it is fully dissolved. The concentration of the brine will depend on the type of food you are preserving, but a common ratio is 1 cup of salt to 1 gallon of water. Submerge the food in the brine solution, ensuring it is fully covered. Place a weight or a plate on top of the food to keep it submerged. Store the container in a cool place, such as a refrigerator or root cellar, for the desired amount of time. Rinse the food thoroughly before using or cooking to remove excess salt.
Vacuum Sealing
Using Vacuum Sealers
Vacuum sealing is a method of sealing food in airtight bags to remove oxygen, preventing the growth of spoilage bacteria, mold, and yeast. This method helps extend the shelf life of food while preserving its quality and flavor.
To vacuum seal food, first, ensure that the food is clean and dry. Place the food into a vacuum sealer bag or roll, leaving enough space at the top for sealing. Open the vacuum sealer lid and place the open end of the bag into the sealing channel. Close the lid and make sure it locks securely. Press the vacuum and seal buttons on the machine, following the manufacturer’s instructions. The machine will remove the air from the bag and seal it shut, creating an airtight package. Once sealed, store the vacuum-sealed food in a cool, dark place such as a pantry or refrigerator.

This image is property of sosfoodlab.com.
Jarring
Hot Packing
Hot packing is a method of filling jars with hot food, which helps to create a proper seal and extend the shelf life of the preserved items. It is commonly used for fruits, vegetables, and jams.
To hot pack food, start by preparing your ingredients and sterilizing your jars, lids, and bands by boiling them. Cook the food until it is hot, either by blanching or cooking on the stove. Fill the hot food into the sterilized jars, ensuring you leave a proper headspace as recommended for each specific food. Remove any air bubbles by sliding a non-metallic spatula or bubble remover along the inside of the jar. Wipe the jar’s rim clean with a damp cloth, then place the lid and band on the jar, ensuring it is tightened securely. Process the jars in a water bath canner or pressure canner, following the appropriate instructions for the specific food. Once processed, remove the jars from the canner and let them cool. The lids will “pop” as the vacuum seal forms, indicating a successful preservation.
Cold Packing
Cold packing, also known as raw packing, is a method of filling jars with raw or unheated food, which is then processed through canning to preserve it. This method is commonly used for pickles and certain fruits.
To cold pack food, start by preparing your ingredients and sterilizing your jars, lids, and bands by boiling them. Pack the raw food tightly into the sterilized jars, leaving the recommended headspace. Pour boiling water, syrup, or brine over the food, ensuring it completely covers the contents and reaches the desired headspace. Remove any air bubbles by sliding a non-metallic spatula or bubble remover along the inside of the jar. Wipe the jar’s rim clean with a damp cloth, then place the lid and band on the jar, ensuring it is tightened securely. Process the jars in a water bath canner or pressure canner, following the appropriate instructions for the specific food. Once processed, remove the jars from the canner and let them cool. The lids will “pop” as the vacuum seal forms, indicating a successful preservation.
Conclusion
When it comes to survival, having access to a steady supply of food is crucial. By learning various food preservation methods such as canning, dehydration, freezing, fermentation, root cellaring, smoking, salting, vacuum sealing, and jarring, you can ensure that your food remains safe and edible for extended periods. Whether you find yourself in a survival situation or simply want to store food for emergency preparedness, these methods will help you preserve your food and provide sustenance during challenging times. Remember to follow proper safety guidelines and use high-quality equipment and ingredients to ensure the best possible results in your preservation efforts. So, equip yourself with the knowledge of food preservation methods and be well-prepared for whatever the future may bring.

This image is property of morningchores.com.
As an Amazon Associate I earn from qualifying purchases.